Transform Your Ride: The Ultimate Guide to Bicycle Electric Conversion Kits
As environmental awareness grows and urban transportation evolves, electric bicycles have become a popular mode of transport. However, many cycling enthusiasts prefer to retain their familiar traditional bikes and enhance their riding experience using electric conversion kits. This article will provide a detailed guide on how to choose and install bicycle electric conversion kits, helping you upgrade your regular bike into an efficient and eco-friendly electric bicycle.

1. What is a Bicycle Electric Conversion Kit?
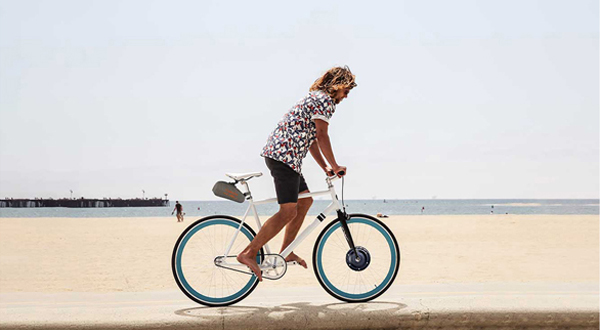
A bicycle electric conversion kit is a set of components that can transform a traditional pedal-powered bike into an electric bicycle. Typically, these kits include a motor, battery, controller, and necessary installation accessories. By installing these kits, riders can maintain their original riding experience while adding electric power to reduce physical exertion, especially useful for climbing hills or long-distance rides.
2. How to Choose the Right Electric Conversion Kit?
Motor Type
The core component of an electric conversion kit is the motor. Common motor types include front hub motors, rear hub motors, and mid-drive motors. Front hub motors are easy to install but may affect steering; rear hub motors offer better traction and stability; mid-drive motors provide better balance and are suited for riders who demand higher power.
Battery Capacity and Range
The battery’s capacity directly affects the range of the electric bicycle. Generally, a larger capacity means a longer range, but it also adds weight to the bike. It is essential to balance your range requirements with the bike's weight. Choose a battery capacity that suits your riding needs.
Controller and User Interface
The controller is the “brain” of the electric conversion kit, managing the motor’s operation. A good controller should offer multiple riding modes and display real-time information such as battery status, speed, and distance through a user interface (e.g., an LCD screen). Additionally, consider the controller’s waterproof capabilities, especially if you ride in rainy conditions.
Installation Difficulty and Compatibility
Selecting a kit compatible with your bike model is crucial. Some kits may require specialized tools or technical skills for installation, while others can be easily installed with minimal tools. Before purchasing, ensure that the kit is compatible with your bike to avoid any installation issues.
3. Steps for Installing an Electric Conversion Kit
Preparation
Before installation, gather all necessary tools, such as wrenches and screwdrivers, and ensure the bike is stable. Consider using a bike stand for easier handling.
Install the Motor
Depending on the motor type, install it on the front wheel, rear wheel, or the bike’s bottom bracket. Ensure the motor is securely mounted to prevent it from loosening during rides.
Connect the Controller and Battery
Follow the instructions to connect the motor, controller, and battery. Ensure proper wiring and organization to prevent accidental disconnections while riding.
Testing and Adjustment
After installation, perform initial testing to ensure the motor functions correctly. Conduct a short test ride in a safe area to check battery levels, acceleration, and braking performance. Confirm everything operates properly before using the bike for regular rides.
4. The Riding Experience After Conversion
Once the electric conversion kit is installed, you will experience an enhanced riding experience. Whether commuting to work or taking a long weekend ride, the electric assist will significantly reduce physical exertion, allowing for a more efficient ride. Additionally, electric bicycles are eco-friendly and low-carbon, making them an ideal alternative to cars and public transportation.

Conclusion
Electric conversion kits offer traditional cyclists a way to upgrade their riding experience. By selecting the right kit and installing it correctly, you can transform your standard bicycle into a high-efficiency, eco-friendly electric vehicle. We hope this ultimate guide helps you complete your conversion smoothly and enjoy a new level of riding pleasure.
- linkedin https://www.linkedin.com/feed/update/urn:li:activity:7236943740349685760/
- quora https://www.quora.com/profile/Lvbu-Tech/Transform-Your-Ride-The-Ultimate-Guide-to-Bicycle-Electric-Conversion-Kits-As-environmental-awareness-grows-and-urban
- slideshare https://www.slideshare.net/slideshow/transform-your-ride-the-ultimate-guide-to-bicycle-electric-conversion-kits/271546496
- medium https://medium.com/@lvbuwheel/transform-your-ride-the-ultimate-guide-to-bicycle-electric-conversion-kits-28c3cdb2db6e